Image

RimWorld Guide - Wealth Management [1.6]

Applicable to Version: 1.6
All RimWorld Guides: LINK

Description: Want to 'kill' raiders before they even enter your map? This RimWorld Wealth Management Guide and Tutorial will help you do just that. It also answers all the following: What is wealth? How do you manage wealth? What counts as wealth? What doesn't count as wealth? Why should you manage wealth? And many more.

________________________

No time to watch the video? The transcript is below!
________________________

Wealth management
Hey everyone, Adam here with another Rimworld guide. I’ve seen and heard a ton of people asking all over the place ‘what is wealth’, ‘how do you manage wealth’, ‘what are raid points’, and so on. There is a ton of information and nuances about these subjects and exactly how they work, so in this RimWorld guide I’m going to focus on two main topics.
Firstly, What is wealth management, why you should do it, and how to actually do so.

And second, What counts as wealth, what doesn’t count as wealth, and how much various things do count.

As I mentioned, there is a ton of things to dig into, but I’m going to try to focus on what is most important as well as what is most commonly asked. I’ll have a follow-up guide that is more specific to Raid Points, which I’ll mention a lot here.

Example
This example base gets raids of about 22 tribal enemies. We can throw out some of the useless items and reduce the size of raids by about 25%. By doing this, 5 enemies simply would not show up. Let’s go back in time and make this happen.


Here’s the same base with some things we didn’t need thrown away. We’ve still got huge piles of food, medicine, spare weapons, drugs, components, 24 Luciferium and 5 mortar barrels. All that’s gone is junk that would most likely never be used or that could easily be acquired again.


This is basic “Wealth Management” a tactic that can drastically reduce raid size. In this example, after the great purge, the base now only gets attacked by 17 tribals. That’s 5 enemies who are essentially dead without a shot being fired. This example’s 25% reduction in raid size would apply on any difficulty.

WEALTH MANAGEMENT
Simply put: Wealth Management means that if you remove some wealth then you remove some raiders. In RimWorld, a significant factor in the size of raids is Wealth that exists on the map.


What exactly is kept and what exactly is tossed is up to you. The more wealth that is reduced the greater effect on the size of raids. 


In this example base I kept items I thought would be useful in the near future or items that were especially rare. I tossed items that would not be used in the near future. Anything I’d consider selling for silver I’d consider throwing away. Silver can always be earned again which means that even silver can be thrown away in the most dire of times.
Here’s a list of all the things I got rid of in this example: 


The methods of “Wealth Management” I recommend most are Trading and Bribery:


By trading, you can turn your useless wealth into useful items. I like to call this ‘wealth that can defend itself’, or effective wealth. 


Things like better weapons, better armor, more material for turrets and mortars, better walls in key defensive locations … you get the idea. 
You can also gift wealth to other factions so that they become allies, allowing you to call them in using the Comms Console, from the Microelectronics Research, for future trade or military assistance. 


I even recommend intentionally settling near Outlander factions so you can easily trade or bribe them. The Empire, from the Royalty DLC, also counts as an Outlander faction, however you will need someone of at least the Knight rank to directly trade with them. You can still call them in for military aid if allied, even without your own royal, though.


Early game, bribes and trades can only be accomplished when a Trade Caravan arrives on your map or if you caravan to another faction. You may not be familiar with forming your own early game caravans and that’s ok. Wealth Management is the perfect time to learn. 


Acquire a colonist who you wouldn’t mind losing if something terrible were to happen, perhaps some random autojoin that you would have banished anyway. Tame a pack animal or three like Alpacas, or Muffalos, or more ideally Donkeys or Horses. Then, form a caravan and head out. Worst case scenario is that you lose the entire caravan.

Wealth successfully managed! Best case scenario you trade for useful items or bribe another faction successfully. Raids only consider colonists and wealth on your map. The moment the caravan leaves the map is the moment the caravan stops counting for raids on your map.
Generally, the items I recommend to purchase via trading are specialty weapons, consumables, and components. Specialty weapons like a Smoke Launcher, an EMP Grenade, a Sniper Rifle, or Reinforced Mortar barrels create additional combat options which would otherwise be impossible. Consumables, like Psychic Shock and Insanity Lances, Low Shields, and even Go Juice can solve problems that may otherwise be incredibly difficult. And, as I always say, ABC, Always Buy Components. But Adam, I already have 400 componenets .. A.B.C. If you are curious if a town has restocked you can check by clicking on it and hitting “Show What will buy”.


Other Wealth Management options involve destroying items. 
The quickest, but most tedious, way to destroy wealth is to abandon items in a caravan. You can do this by setting up a caravan as previously mentioned and either abandoning the entire caravan off your map somewhere, or by clicking through the caravan’s inventory on the world map and having the drop item by item.


Grenades can also remove items quickly. Zone all the items into a pile and throw Molotovs or Frag Grenades at the pile. This method is especially useful for fresh corpses. One additional trick to the incendiary method is to roof the area so that the auto-rain event doesn’t spawn and put out the fire before everything is gone. You’ll also want to make sure colonists are not zoned to add additional items to the pile or extinguish the fires.


Zoning items outdoors also causes many items to deteriorate away. As the items lose hitpoints they quickly lose their value. Zoning these in water will increase the speed at which they deteriorate. You can see more details about this in my guide on Tainted Clothing.


I also wanted to take some time to talk about wealth bloat. Instead of having to cull your wealth every so often you can implement methods in which you simply gain less wealth in the first place.


A common example is storing thousands of food. Having food storage for a bad event is a good thing, but having 6,000 rice stored for 3 colonists is doing way more harm than it is helping. Even worse, would be processing that 6,000 rice into meals and storing the meals. This is one of the most common things I see when tuning in to other’s RimWorld content. I plan on putting out a food production guide that will cover this in much more detail, so, if curious about the specifics please check out that video as well!


Remember that virtually everything in Rimworld increases in value as it is processed. The meals are worth more than the ingredients. Store enough food so you can survive Toxic Fallouts, which can now only last around 11 days maximum, unlike the early days of RimWorld. Don’t store multiple years’ worth of food. 


The concept of only store what you need applies to all items. Common mistakes are mining all the resources available immediately. Instead, store a bit and mine the rest when needed. Likewise, set jobs such as cutting stone blocks to ‘do until x’ rather than having thousands of cut stone lying around, causing raids to be larger and deadlier. 


If you have a butchering empire, you may be radically increasing wealth through meat and leather. Then processing these two into meals and clothes can create even more wealth that is only stored and not used. A drug empire is the same concept: be careful of storing excessive plants or even worse, completed drugs.


Those are all fine ways to play, but try to regularly remove those goods. Ideally trading them for ‘wealth that can defend itself’ or allies. 
Overbuilding can also be an issue and that is more than simply “Don’t make everything out of gold.” The most common example is in a mountain base and smoothing everything everywhere. Perhaps, consider not smoothing the floors in the stockpile rooms and hallways that are not frequently used. A small addition to this I will mention ties in with over production in general. If you are keeping 20 times more food than you need, that also equates into a larger storage area than you need, more coolers than you need, etc. All of this adds to wealth.


I also wanted to mention that keeping Item Quality in mind can be very important. Many items drastically go up in market value with quality but may not go up in usefulness. For example, an item of Masterwork quality is generally about twice the value of an item of Normal quality. Depending on the item and its use, you may or may not find it twice as effective. A good example of this is shelving. If you have a shelf you keep molatovs on out by the burn pile, it doesn’t really matter if it is poor quality of legendary. When building these things it may be a good idea to have one of your less skilled builders do the work. 


Having said all of this, I want to be clear that absolutely maximizing wealth management is not mandatory. You should play in the way you find most fun and adjust the settings appropriately. I tend to be somewhat overzealous, especially early game, about my wealth management due to the extreme difficulties I choose to play on. If you are playing on peaceful, for instance, feel free to smooth that mountain until you can see your reflection in every rock.


WEALTH
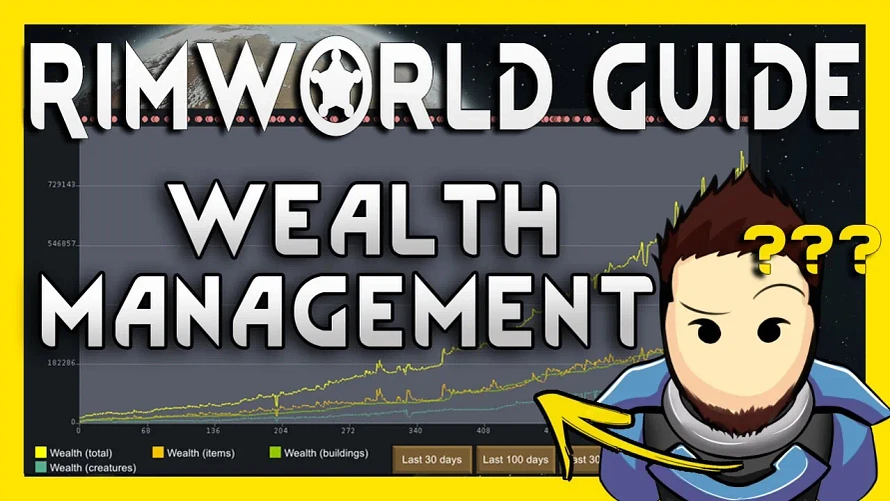
Alright, so what counts as wealth? Generally, what counts as wealth is anything visible on the map that is not controlled by another faction, though there are a few exceptions. The number I recommend using for “Wealth Management” is “Colony Wealth” located by clicking the History Button (book button) and the Statistics Tab. This number is easy to check while playing. 


There are no specific points of wealth to keep in mind when considering threats and raids. Colony Wealth does affect mood through Expectations. Just remember simply, more wealth means bigger threats. 


Colony Wealth is the number I recommend watching but it is not perfectly accurate as not all wealth is created equal in terms of raid size, but I’ll get more into that during the Raid Point guide. 
The two main exceptions to “Colony Wealth” are that firstly, all buildings are counted at half their market value and second, all buildings are counted as if they had full hitpoints. 


I call this other number “Storyteller Wealth”. “Storyteller Wealth” is only visible via Development Mode. 
We tested a lot of crazy scenarios using this “Storyteller Wealth” number to see what truly counts. Rimworld does not calculate wealth continuously. After changing something, I gave it a moment for Rimworld to update. Please, test these scenarios and tons of other scenarios. If you find anything interesting please share in the comments as I’d love to see them.


Here’s some rapid fire of what we’ve discovered,
Visible starting walls, doors, columns, floors, tables etc. all count.
If they are not visible, they don’t count. 
Destructible ancient things don’t count.
Stone Tile and Flagstone roads count.
Bridges count.
Asphalt and Dirt roads don’t count
The walls of an Ancient Danger don’t count until claimed. The hidden items and buildings inside don’t count.
Open the Ancient Danger and the items immediately count. 
The floor immediately counts.
Walls, Tables, Columns, Sarcophogi, Cryptosleep Caskets and other furniture don’t count until claimed.
Stone Chunks don’t count.
Unmined materials don’t count.
Mined items however, immediately count. 
Meteors don’t count. 
Mine them, though, and the resources count.
Ship parts don’t count, until deconstructed, which makes the dropped resources count.
Enemy Raider’s don’t count. Anything in their inventory doesn’t count. Once dead, the corpse counts. The tainted clothes count. Anything that drops counts.
A Mech Clusters. Nothing counts.
Defeat the Mech Cluster and the buildings still do not count. Any items do, however.
The walls, unstable power cells and other buildings don’t count until claimed.


For sieges, all the dropped items immediately count. 
Barricades and Mortars don’t count until claimed.
A trade caravan doesn’t count. Anything in their inventory doesn’t count. If they die, the corpse counts. The tainted clothes count. Anything that drops counts.


Living wild animals don’t count.
Tamed animals do count.
Every fresh corpse on the ground counts. 
Buried corpses still count while Fresh.
Corpses in a Transport Pod count and stays fresh forever.
Rotten and desiccated corpses don’t Count.
Rotten human corpses don’t count, but tainted clothes on the corpse do count.
Mech Corpses count.
Items, like Yayo, count. Forbidden. Unforbidden. Stockpile. No stockpile. It doesn’t matter, it all counts.
Home Zone. No Home zone. Both count.
In a pawn’s inventory. Counts.
In a prisoner’s inventory. Counts.
In a slave’s inventory. Counts.
In a guest’s inventory. Does NOT count. Guest weapons, clothing and inventory don’t count.
In a tamed animal’s inventory. Counts.
In any of those inventories and in a Cryptosleep casket: still count.
In any of those inventories and in a Transport Pod: still count.
Huge pile of gold. Counts.
Take the gold on a Caravan. That Gold does NOT count here on this map tile.
The gold does count on the caravan. Ambushes may be scary. Though you could park the caravan over your settlement to prevent ambushes, sort of like having an offshore banking account.
A full hitpoint item is worth its Market Value.
A damaged item’s Market Value is significantly reduced. 
The effectiveness of weapons isn’t affected by Hit Points.
Tainted clothing’s Market Value is reduced by 90%.
Damaged clothing’s Market value is significantly reduced.
Both may cause mood issues, but are just as effective as the full hitpoint untainted version.
Any building only counts for half its Market value, though many buildings don’t list the market value. 
Significantly damaged buildings still count as if they had full hitpoints. 
An uninstalled piece of furniture counts as an item and counts at full market value.
An installed piece of furniture counts as a building and counts at half market value.
A damaged installed piece of furniture counts as a full hit point building.
A damaged uninstalled piece of furniture counts as an item and at the displayed market value.
A colonist is worth the displayed market value.
A pawn’s clothing, weapon and inventory all count, but aren’t included in this Market Value number.
Skill levels affect market value.
Health conditions affect market value, including missing limbs.
Minor injuries affect market value.
Brain damage affects market value the most.
Implants always count at full value whether installed or not.
A prisoner counts for the full market value.
Slaves count for only 75% of the listed Market Value.
Floors of any type count as buildings, meaning they only give half wealth as well. 
Floors hidden by walls still count. 
The wall counts too.
Smooth Stone Floors count.
Smooth Stone floors covered by another floor do NOT count. Only the floor on top counts.
Research levels do not add to wealth.
Psycasting levels do not either.


Commonly made structures like walls, doors, and floors all count as buildings but don’t display a market value. All the numbers displayed are listed in Market Value. Halve all numbers for Storyteller wealth. 
Remember, Don’t feel obligated to Manage your wealth. You should play Rimworld however you most enjoy it. Wealth management is an effective way to manage the size of raids and have more success on higher difficulties though. It is definitely NOT a requirement to enjoy or even beat the game. Anyway you want to play Rimworld is great.
Alternatives to the Wealth system in Rimworld include turning down the threat scale in the custom difficulty options, using Wealth Independent Mode, and using mods. 


Wealth is only the first factor in how Rimworld determines the size of Raids. In short, Rimworld also looks at your Colonist Count, your combat animals, the difficulty setting and what can be called an “Adaption Factor”. I’ll be doing a follow up video that discusses Raid Points and how all the parts work.


Conclusion
And that does it! Hopefully this rimworld guide has helped you to understand wealth in RimWorld, both what it is, where it comes from, and how to manage it effectively.


The main takeaways are to be careful what you keep in storage, turn that wealth bloat into effective wealth by trading or gifting, and to ensure you aren’t over producing. By doing this, you can effectively kill many raiders before they even get to your base.


If you enjoyed this Rimworld guide or it helped you out at all please consider subscribing to the channel, liking the video, leaving a comment down below, and sharing it with others. If you’d like to reference a written version of this guide be sure to head over to my website at adamvseverything.com/guides.


And, as always, thanks for watching!
Image

RimWorld Guide - Tainted Clothing [1.6]

Applicable to Version: 1.6
All RimWorld Guides: LINK

Description: A straight to the point RimWorld guide that explains what to do with tainted apparel! This RimWorld Tutorial guide covers what tainted clothing is, which RimWorld colonist traits can wear tainted apparel without a mood debuff, and the easiest and most efficient ways to get rid of all the dead people's clothing. You can use this and the rest of the RimWorld guides in this series as a general knowledge bank and Rimworld Walkthrough.

________________________

No time to watch the video? The transcript is below!
________________________

Hey everyone, Adam here with another RimWorld guide. This one is a little more off-the-cuff as it’s a rather small topic, but one I get asked often enough that I thought it was probably a good idea to make a guide about it.


So, in this RimWorld guide I am going to talk about tainted clothing and the different ways to deal with it.

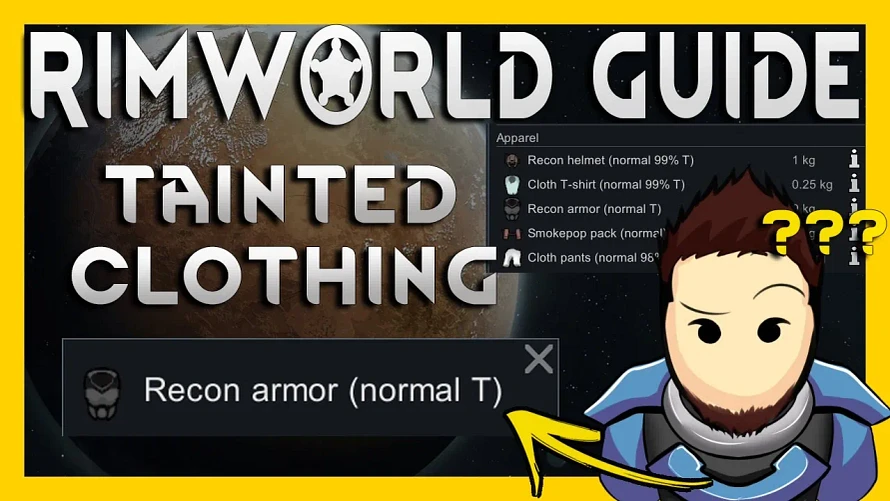
In RimWorld, when a character dies, any clothing they are currently wearing immediately becomes tainted. You can tell an item is tainted by the T show right after the durability percentage.

By default, a colonist will receive a mood penalty if they wear tainted clothing. You can use some of the clothing rules I go over in my previous RimWorld clothing guide, link in the description, to make sure they never put these on, though.

However, there is an exception to this. A pawn with the BLOODLUST trait will not get the mood debuff for wearing tainted clothing. As of this video, this is the only background that does not receive the mood penalty. Both Cannibals and Psychopaths will not be happy wearing the clothing.

Now, sometimes, it can still be worthwhile to force tainted clothing onto a pawn. Getting a tainted marine armor early game when pawns have super low expectations can be amazing, for example.

Now, what do you do with all that tainted clothing you receive if you’ve ran out of Bloodlusted pawns to outfit? Well, there are several ways to rid yourself of these.

I want to first talk about the smelter as this is a way to actually get some resources back from certain tainted pieces, namely armor.

Go to your smelter. Click BILLS. Click ‘ADD BILL’. Click ’SMELT APPAREL’. Make sure you click smelt and not destroy. I also usually go ahead and suspend the work order for now until I get it set up as I don’t want someone to run over and start trying to smelt something I don’t want them to. Now, you will click ‘DETAILS’.

Here, on the right-hand side, you want to uncheck ‘ALLOW CLEAN APPAREL’. Once this is set, click on the ‘DO X TIMES’ button and set it to ‘DO FOREVER’.

With this set, colonists with the correct job assignment will come over and turn any tainted armor into usable material to use as you please.

You will also want to set up a work order to completely destroy tainted equipment that is NOT smeltable. TO do this, we’re going to add another bill to the smelter, only this time we will choose ‘DESTROY APPAREL’. On this work order we want to make sure to again uncheck ‘ALLOW CLEAN APPAREL’ but, also, very importantly, uncheck ‘ALLOW SMELTABLE’.

Setting up these two orders will ensure you get the most out of your tainted items, while disposing of the useless ones.
If you’d like, you can further optimize this and disable things you might want to wear despite the taint, such as early marine armors.

If you do not have a smelter, you can also destroy tainted apparel at either a CREMATORIUM or even a CAMPFIRE. However, neither of these allow you to set an order to deal with smelt able items.

The second way to get rid of tainted gear is to simply burn it out in the open. To do this, go to the Architect menu in the bottom left and click ZONE. Then select STOCKPILE ZONE. Drag a box large enough to dump all of your tainted goods in, making sure this is done in an area where a large fire will not cause any issues, such as stone, or sand. Next, click on the stockpile zone you just made and click the ‘storage’ button’. How click the ‘CLEAR ALL’ button, then change the priority to ‘CRITICAL’. Fomr here, you will want to scroll down and click to palce a checkmark by ‘APPAREL’. Be sure to then turn off ‘Allow Clean Apparel’. This will make it so colonists or animals set to hauling will load the area with your tainted clothing.

Next, make sure the area is not in the home zone by going back into the ZONE menu and clicking ‘REMOVE HOME ZONE’, then deleting any home zone that is in the area. If you do not, your colonists will attempt to save the clothing you are trying to get rid of.

Once all of the tainted items are in place, simply equip a Molotov or Incendiary launcher and target the area, burning all of your problematic clothing away.

The third, and least involved option to get rid of tainted clothing is to simply let it deteriorate. Items left outside and unroofed are going to eventually decay to nothing. You can speed this process up, though. To do this, simply make the stockpile zone we talked about earlier over some water. Items decay more quickly in RimWorld if left in water. This even includes corpses!

I did also want to mention quickly that WEAPONS as well as UTILITY items do not get the tainted apparel tag. So, if you have some enemies die with shield belts, feel free to strip their corpses and use the belts, whether your pawn is bloodlusted or not.

And that does it! Everything you could possibly want to know about Tainted clothing in RimWorld. Hopefully with all these methods, you will know what to do with tainted clothing at any stage of your RimWorld playthrough.
If you enjoyed this RimWorld guide and want to see more RimWorld tutorials on the channel, please let me know by liking the video and leaving a comment. I also have tons of crazy RimWorld challenge runs on the channel, so be sure to check those out if you have not already!
And, as always, thanks for watching.

Image

RimWorld Guide - Difficulty Options [1.6]

Applicable to Version: 1.6
All RimWorld Guides: LINK

Description: A straight to the point RimWorld guide that answers the question 'What are the differences between the different difficulties and settings in RimWorld?'. I go over the differences in all six difficulties so you can choose the right one for your type of RimWorld playthrough or even create your own.

________________________

No time to watch the video? The transcript is below!
________________________

Hey everyone, Adam here with another RimWorld guide. People have been asking me “What difficulty should I play?” So I decided to make a RimWorld Guide to tell you all about the six different difficulties that currently exist in Rimworld.

Alright, so let’s get right into it. RimWorld has six different difficulties ranging from Peaceful to Losing is Fun. Each difficulty setting can also be customized to tailor the experience to your liking.
I will go over the parameters for the easiest difficulty, Peaceful, and then show you the differences between that and the other five.


Threats
The first set of parameters are Threats.


On Peaceful the Threat scale is set to 10% by default. Meaning that if there were any threats, they would only have 10% of the strength of a normal difficulty event.


Major threats such as raids, infestations, mechanoid attacks, and manhunting animals are disabled.


Quests that are offered to you will not have violent conditions such as raids or having to attack into an enemy stronghold.


The normal intro quests such as a single angry animal will not occur either.


Speaking of animals, on peaceful difficulty, you won’t have to worry about predators getting hungry and hunting your colonists.


In addition to this, you’ll always have weather within the listed average temperature of your map, and will not have to worry about things like toxic fallout or volcanic winter.

Economy
The second set of parameters are Economy based.


On Peaceful you’ll be getting 20% more plant harvests and mining yields. You’ll also be researching things 20% faster. You won’t have to worry about traders jacking up their prices and your defensive turrets are 50% cheaper to re-arm.


Lastly, the enemy pawns you down will be 50% less likely to instantly die, allowing you to more easily steal their equipment or imprison them. 

GENERAL
There is also a set of general parameters for each difficulty which aren’t able to be categorized by the other two.


On peaceful you’ll be getting a +10 mood boost at all times on all of your colonist so that it’s easier to keep them happy.


Your pawns will also be 70% less likely to get food poisoning than normal, and about the same reduced chance at getting diseases in general.


You also won’t have to worry as much about animals fighting back if you decide to attack a normally aggressive creature.


In addition to this, you don’t have to be as careful with your firearms, as the chance of friendly fire is reduced by 60%.


Lastly, regardless of the map you choose to play on, it will not contain any ancient dangers or bug hives.

Player Tools
As far as the ‘player tools’ section goes, those are all readily available regardless of your difficulty. But, if you’re feeling a bit adventurous, you could turn off things like traps in order to increase the difficulty.

Adaptation
I will explain adaptation and wealth independent mode in other guide videos, but for now, just know that, by default, the game increases in difficulty relative to your colony’s wealth UNLESS you turn on Wealth-Independent progress mode, which will make it so the game continuously gets harder the longer you survive, regardless of wealth.

Other Difficulties
The other five difficulties after Peaceful are:


Community Builder, which adds in your first major threats like raids, quest threats, etc.


Adventure Story, which opens you up to more animal attacks as well as extreme weather.


Strive to Survive, which is Rimworld’s version of a ‘Normal’ difficulty. Sort of how the game was made to be played, so to say.


Blood and dust, which ratchets the difficulty quite a bit higher than the previous tier.


And finally, Losing is fun, which is Rimworld’s most challenging standard difficulty and quite a bit harder than Blood and Dust.


To see the exact percentages of what changes from one difficulty to the other, simply click the Custom… bubble on the difficulty select screen, then scroll down and click the ‘Set standard playstyle’ button. You can then look through all the various stats below there.


This is also where you can customize, as the name suggests, each individual part of the difficulty.


So, for instance, if you want the hardest raids and events possible you could put the threat slider all the way to 500 percent, which is more than twice as hard as ‘Losing is Fun’. On the flipside of this you could also make it so you have super-fast research and no disease.


Also, you may have noticed the option between ‘Reload anytime mode’ and ‘Commitment mode’. With commitment mode you have a single save file that is constantly updating so you cannot reload your game from a previous state. So, for instance, if you have a raid go very badly and want to reload and try it again to see how you do, you cannot do this with commitment mode and will want to make sure you start your game in ‘Reload anytime mode’ instead.

CONCLUSION
The last thing I wanted to mention, is that you can change the difficulty at any time during the game. TO do this just click the icon in the very bottom right of your game, then choose ‘options’. In here, you’ll want to click ‘Storyteller settings’ towards the bottom middle.


ENDING
Alright, and that does it for this RimWorld guide regarding difficulties. Hopefully you now know which difficulty to choose to get the kind of RimWorld experience you prefer or even how to custom tailor the experience to your playstyle.


If you liked this guide and want to see more, please let me know by subscribing to the channel, liking the video, and commenting down below. And, as always, thanks for watching.

Image

RimWorld Guide - Storytellers [1.6]

Applicable to Version: 1.6
All RimWorld Guides: LINK

Description: A straight to the point RimWorld guide for beginners that answers the question 'Which Storyteller Should I Choose?'. I go over the differences in all three storytellers so you can choose the right one for your type of RimWorld playthrough.

________________________

No time to watch the video? The transcript is below!
________________________


Hey everyone, Adam here with another RimWorld guide. People have been asking me “What Storyteller Should I choose” So I decided to make a RimWorld Guide to tell you all about the three different storytellers and what choosing them will actually do to your RimWorld playthrough.

Alright, so let’s get right into it. RimWorld has three default storytellers aside from the tutorial one – Cassandra, Phoebe, and Randy. The choice of storyteller plus difficulty can change your playthrough significantly. The biggest thing that changes between storytellers is the cooldown, or lack thereof, on different types of events. I’m going to go over all three story tellers a bit, then do a quick rundown on who you should choose based on what sort of experience you want to play.


CASSANDRA
Cassandra is the most consistent storyteller and sends things at you on an increasingly difficult curve. When starting a new game against Cassandra, you have an 11 day cushion before large threats begin to occur. And, if one of the events has not been a raid by day 20, she will send a raid at you.

In RimWorld, there are EIGHT large threats in the game files. These are: Raids, Infestations, Deep Drill Infestations, Manhunter Packs, Defoliator Ships, Psychic Ships, Mass Animal Insanity, and, with the Royalty DLC – mech Clusters.

Once Cassandra has started throwing things at you, she will hit you on and off for about 4 and a half days before giving you a 6 day break. During her ‘ON’ period she will space events out by a minimum of 1.9 days. Cassandra can hit you with 1-2 large events in this time period. 
It is important to note that quests and their events do not count towards this timer. So, if you accept a mech cluster through a quest, Cassandra can still hit you with her event during.

Cassandra’s cooldown cycle for miscellaneous events such as pod crashes, meteorites, toxic fallout, etc is the same as her large threats but are on their own timer. So, for instance, you can have a toxic fallout and a raid back to back, having one of the large threat events I mentioned earlier does NOT put miscellaneous events on cooldown.
The last thing I will mention for Cassandra for now is that she has a cooldown on disease events of 9 days. This means she can’t hit you with a disease EVENT in the first nine days of a playthrough. Independent consistent

PHOEBE
Despite the game screen saying Phoebe can hit just as hard as anyone on higher difficulties, she is absolutely the most consistently easy storyteller. This doesn’t mean she can’t be difficult, only that she can’t be as difficult as the other two.


Here are the main differences regarding Phoebe as compared to Cassandra.


Unlike Cassandra’s 11 day cushion, Phoebe’s is 13, giving you two extra days to prepare. Also, Phoebe’s on/off cycle is 8 and 8 compared to Cassandra’s 4.6 and 6. Phoebe’s incident range is also a 1 whereas Cassandra’s is a 2. All you really need to know about these numbers is that Phoebe is much less likely to punish you with difficult events back to back and is actually unable to hit as often as Cassandra.


Phoebe also has three more days added to her minimum disease timer. Unlike Cassandra, who can give you a disease event in 9 days, Phoebe’s is 12.


Lastly, Phoebe does give, on average, more non-royalty quests than Cassandra.


RANDY
Alright, last but certainly now least – Randy Random. As his information suggests, Randy is definitely random and can make for some crazy and interesting playthroughs. Due to how RNG works, though, you can sometimes have huge chunks of time in which not much happens. Randy CAN be the hardest storyteller in small bursts due to his short cooldowns, but he isn’t consistent at it and you have to get pretty unlucky, for instance, to have a string in which he sends a raid at you every day. But it is possible. Another great example of this is that Randy is the only storyteller capable of hitting your colonist with a disease event on day 1 hour 1.


Basically, how Randy works, is that each category of events are all in the same pool and have their own weight. It is more likely to get a big threat than having a ship chunk fall, for instance, but, given the random chances, sometimes you’re just going to have every event for a season or longer be ship chunks. And, as mentioned, his cooldowns are the lowest of any storyteller. 


One final thing I’d like to mention here is population. I won’t go into details on this video, but each storyteller has a population curve. Basically, this determines how likely you are to get into a situation in which you can gain a new colonist. In 1.1, this was changed significantly, but, Randy’s curve is still slightly different than the other two storytellers. Long story short, you are slightly more likely to receive more colonists (and for longer) with Randy than the other two.


CONCLUSION
Alright, so you’ve had me throw numbers at you but what you really want to know is “Which storyteller should you choose?”
Choose Cassandra if you want a consistent experience in which you are hit with events fairly often but given some time to recover after each cycle. She is sort of your standard experience storyteller.


Choose Phoebe if you want the easiest experience. Although she is consistent like Cassandra, her increased time frames on events and downtimes give you a lot more time to recover and rebuild if something goes badly.


Choose Randy if you want an (almost) entirely random experience. You may get thrown into situations that are impossible to win, even right off the bat, but due to how RNG works it won’t be the norm. Other times, you may sit for seasons at a time only receiving drop pods full of milk and ship chunks. Randy can occasionally be boring in this way, however, you always have to be on your toes and ready for anything. Against Cassandra, for instance, if you’ve had two large events recently, you know you’re going to have a cooldown before another of those happens (unless it is from a quest), Randy might send a new event at you the very next day.


ENDING
Alright, and that does it for this RimWorld guide regarding storytellers. Hopefully you now know which storyteller to choose to get the kind of RimWorld experience you prefer.


If you liked this guide and want to see more, please let me know by subscribing to the channel, liking the video, and commenting down below. And, as always, thanks for watching.

RimWorld Download Instructions

Testing:

I am moving all my free downloads back to my website here but putting them as 'free-member exclusive' - things like custom xenotypes, scenarios, save files, etc.

Why is this moved again?

The cloud host I was previously using kept locking me out of the account due to too many downloads on the account per day. Everywhere I looked cloud services had a file limit or daily bandwidth limit. This shouldn't happen here. I know there are other options, but this is the one I am happy with for now.

But don't worry - you don't have to be a paid member to download any of these.


How do I use the RimWorld files?

Download the file and place it in the applicable folder here: AppData\LocalLow\Ludeon Studios\RimWorld by Ludeon Studios

IE:
/Blueprints
/Ideos
/Saves
/Scenarios
/Xenotypes

To access the folder more easily, open RimWorld and click 'Options' then 'Open Log File'. The Blueprints, Ideos, Saves, Scenarios, Xenotypes, etc folders should be there.

This will allow you to load custom Xenotypes and settings in game from my runs and series or even continue my save files.

For Blueprints, you MUST have the mod 'Blueprints by Fluffy' installed and activated. Once the blueprint file is in the 'Blueprints' folder you will be able to right-click in game and import the blueprint you want to that save.

RimWorld Downloads Collection Link: TBA

"What about X, Y, and Z???"
Don't see a download link for a Xenotype, Blueprint, etc that you'd like to have? Just let me know in a comment or in the Discord and I will add it if I still have it saved!